

Removing insulation can seem like a daunting task, but it is crucial for maintaining the comfort and efficiency of your home. Proper insulation removal helps improve air quality, reduces energy costs, and prepares your space for new insulation. If your attic is unfinished or contains old, damaged insulation, it may be time to consider this important home improvement.
When you remove outdated insulation, you also create a cleaner and healthier environment inside your home. Insulation can trap dust, allergens, and even pests, which can lead to various issues. Taking the time to clean your attic and replace old insulation can greatly enhance your home’s overall functionality.
In addition to enhancing comfort, attic insulation removal allows for better installation of new insulation materials. This ensures that your home is properly sealed and energy-efficient. Understanding the benefits of insulation removal will encourage you to take action and improve your living space for the long term.
What Is Attic Insulation And Why Might You Need To Remove It?
Attic insulation helps regulate your home’s temperature and improves energy efficiency. However, over time, existing insulation can become less effective or even harmful. Knowing when and why you may need to remove old insulation is essential for maintaining a comfortable living environment.
Understanding Attic Insulation Types
There are several types of attic insulation, each serving a specific purpose. Common types include fiberglass, cellulose, and spray foam.
- Fiberglass is lightweight, relatively easy to install, and often found in batts or rolls.
- Cellulose is made from recycled paper and has good thermal performance.
- Spray Foam provides an air-sealing effect in addition to insulation.
Each type can wear down or become damaged, leading to a need for removal. If the insulation is damp, moldy, or pest-infested, it is critical to remove it to maintain air quality and efficiency.
Signs You May Need To Remove Old Insulation
There are several clear indications that your attic insulation needs to be removed.
- Physical Damage: Look for water stains or mold growth. These are signs that moisture has compromised the insulation’s integrity.
- Pest Infestation: Evidence of rodents or insects can make the existing insulation unsanitary. Removing insulation that has been contaminated by pests is critical for health and sanitation reasons.
- Poor Energy Efficiency: If your energy bills are higher than usual, it could indicate that the insulation is no longer working effectively.
If you see any of these signs, it may be time to consider insulation removal.
Benefits Of Removing Insulation From Your Attic
Removing old insulation can provide several benefits for your home.
- Improved Energy Efficiency: Replacing outdated insulation with new, higher R-value materials can significantly lower your heating and cooling costs.
- Enhanced Air Quality: Old insulation can harbor allergens or toxins. Removing it can create a healthier indoor environment.
- Increased Home Value: A well-insulated home is attractive to buyers. New insulation can make your home more appealing in the real estate market.
How To Safely Remove Attic Insulation
Removing attic insulation can be a straightforward task when done correctly. Following specific steps and precautions will ensure safety and efficiency during the process.
DIY Attic Insulation Removal Steps
Start by preparing the attic for insulation removal. First, ensure you have proper ventilation. Open windows or use fans to promote airflow.
Next, wear protective gear, including gloves, goggles, and a mask, to avoid inhaling any harmful particles.
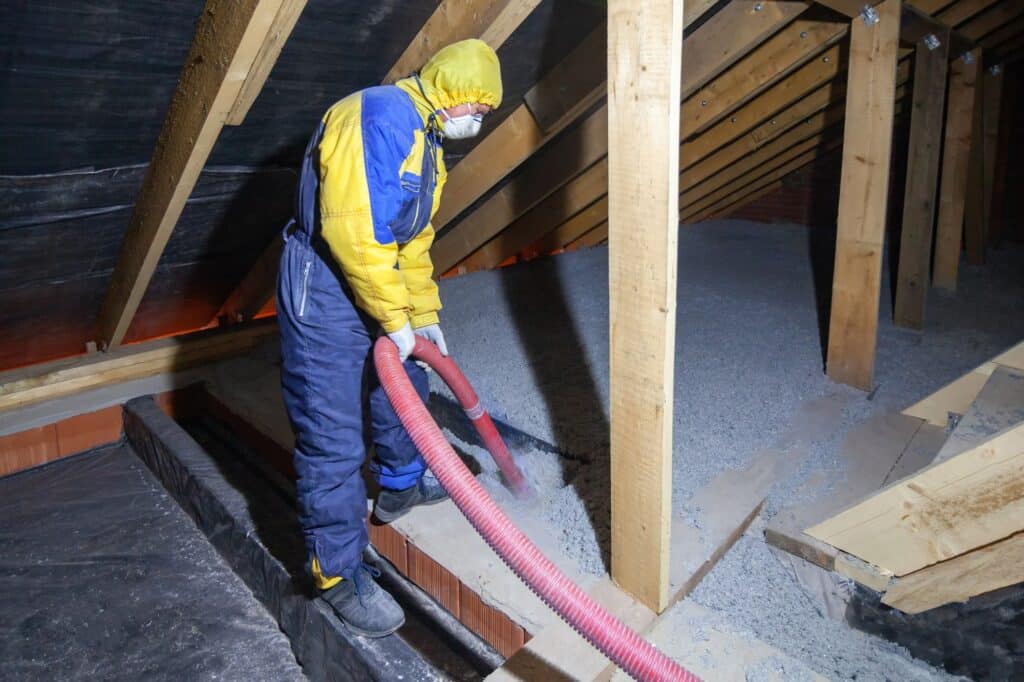
Begin the removal by identifying the type of insulation. If you’re dealing with blown-in insulation, a vacuum designed for insulation removal will be useful.
Carefully suction out the insulation using the vacuum, making sure to collect it in sealed bags. This keeps your attic clean and prevents debris from spreading.
Use a rake to gather loose insulation into manageable piles. Once piled, use a dustpan to transfer it into large waste bags.
After most of the insulation is removed, thoroughly check for any leftover material. Cleaning your attic after removing the insulation will leave it ready for new insulation installation.
Safety Precautions For Insulation Removal
Safety is crucial during insulation removal. Always wear protective gear, such as gloves, a mask, and goggles, to shield against dust and allergens.
Pay attention to your surroundings and avoid working alone in case of emergencies.
Take breaks every 15 minutes, especially if the attic is hot. High temperatures can lead to heat exhaustion.
Also, be cautious of any signs of mold. If you detect moldy insulation, consider contacting a professional to address the issue safely.
Tools Required For Attic Insulation Removal
Gathering the right tools will make the insulation removal easier. Key tools include:
- Insulation removal vacuum: Ideal for blowing out and collecting insulation.
- Rake: Helps gather loose insulation into piles.
- Dustpan: Useful for transferring insulation into waste bags.
- Sealed bags: Important for containing removed insulation safely.
You may also need a flashlight for proper visibility and a ladder if your attic has a steep pitch. Having these tools ready allows for a smoother and more efficient removal process, reducing the mess and streamlining your project.
What Is The Cost Of Attic Insulation Removal?
Attic insulation removal costs can vary based on several factors, including the type of insulation and whether you choose to hire professionals or do it yourself. Understanding these elements helps you make informed decisions.
Factors Influencing Insulation Removal Cost
Several factors affect the cost of attic insulation removal. The most significant is the type of insulation being removed. For example, fiberglass and cellulose insulation require different handling and disposal methods, so costs can vary.
The size of your attic also plays a role. Larger attics will typically incur more labor and disposal costs.
Additional factors include local labor rates and the availability of removal services in your area.
For instance, in some regions, the average cost to remove insulation ranges from $1 to $2 per square foot. Thus, a typical 600-square-foot attic might cost between $600 and $1,200.
Comparing DIY vs. Professional Insulation Removal Services
You can choose between DIY removal and hiring attic insulation professionals. DIY can save you money, but it requires tools and safety gear.
Insulation, especially old or damaged types, can pose health risks. Protective equipment, like masks and gloves, is essential.
On the other hand, professional insulation removal services may have higher upfront costs. These services typically charge between $1,600 and $3,600 for a complete job.
Professionals offer expertise in safe handling and disposal. They also ensure that your attic is properly prepared for new insulation, which can save you trouble in the long run.
Average Costs For Different Types Of Insulation
Different types of insulation come with different removal costs. Here are some average costs for common insulation types:
- Fiberglass Insulation: $1 to $2 per square foot
- Cellulose Insulation: Similar range, but may be slightly higher due to the need for special handling
- Spray Foam Insulation: This can be significantly more expensive, sometimes exceeding $3 to $4 per square foot due to complex removal processes.
Understanding these averages helps you budget for your project effectively. Cost estimates can range based on the condition and insulation you have, so it’s wise to get several quotes from insulation services.
What To Do After Removing Attic Insulation?
Once you have cleared the old insulation from your attic, it’s important to focus on the next steps. This includes selecting the right insulation material, preparing the attic space for new insulation, and deciding whether to hire professionals or do it yourself.
Choosing The Right New Insulation Material
Selecting the proper insulation material is key to improving your home’s energy efficiency. Common options include fiberglass, cellulose, and spray foam.
- Fiberglass: This is budget-friendly and easy to install. It provides decent thermal resistance.
- Cellulose: Made from recycled paper, it’s eco-friendly and offers good soundproofing.
- Spray Foam: This option provides the best air-sealing capabilities, but it’s more expensive and requires professional installation.
Consider your home’s insulation needs, your budget, and any specific requirements like moisture control before making a choice. Make sure the insulation meets local building codes.
Preparing The Attic Space For New Insulation
Before installing new insulation, thoroughly clean the attic. Remove any remaining debris and check for any signs of moisture or pest damage.
- Seal Gaps: Inspect for cracks and gaps around pipes, vents, and electrical fixtures. Use caulk or expanding foam to seal these areas.
- Install Ventilation: Ensure your attic has proper ventilation to prevent moisture buildup. This includes soffit vents and ridge vents.
- Check Wiring and Plumbing: Ensure that any electrical wiring or plumbing is secure and in good condition. If you find any issues, address them before insulation installation.
Hiring Insulation Contractors vs. DIY Installation
Deciding between hiring insulation contractors or tackling the project yourself depends on your skills and comfort level.
Hiring Professionals:
- Pros: They bring expertise, ensure safety, and often provide warranties. They can handle tricky areas that may be difficult for a homeowner to reach.
- Cons: Hiring can be more expensive upfront.
DIY Installation:
- Pros: This option can save money if you have the right tools and experience. You control the timeline.
- Cons: It requires substantial effort and some technical knowledge. Mistakes can lead to reduced insulation effectiveness.
Consider your ability, time commitment, and budget when making your choice. This will help you prepare for a successful insulation project.
How Long Does The Attic Insulation Removal Process Take?
The time it takes to remove insulation from your attic can vary widely. Knowing the estimated durations for both DIY and professional removal can help you plan better for the project.
Typical Duration For DIY Insulation Removal
If you decide to handle removal yourself, expect the process to take longer than a professional job. An attic of about 1,500 square feet can take anywhere from 6 to 18 hours. This time can vary based on your experience and the insulation being removed.
Be prepared to gather tools like a shop vac, bags for disposal, and safety gear. The more organized you are, the quicker you can finish. If you’re working alone, it may take the full 18 hours. Having a helper can speed things up significantly.
Time Frame For Professional Removal Services
Hiring professionals can save you time. A team trained in attic insulation removal can typically complete the job in 4 to 6 hours for a similar-sized attic. This shorter duration is due to their experience and specialized equipment.
When you choose professionals, they can efficiently manage safety protocols, ensuring a safe environment. They are also skilled in cleaning up afterward, leaving your attic in good shape. Investing in professionals can be beneficial if you’re short on time or not comfortable with the task.
Factors That Can Affect Removal Time
Several factors can influence how long the removal takes. Type of insulation plays a big role. For instance, fiberglass insulation may be easier to manage than old cellulose insulation, which can be denser and harder to remove.
The age of insulation matters as well. Older insulation may be settled, making it more challenging to extract. Access to your attic can also affect time. If there are obstacles like beams or wiring, the job may take longer.
Other considerations include the weather and the overall condition of your attic. Poor conditions can slow the removal process and require additional precautions. Staying aware of these factors can help you anticipate the time needed for your project.
What Are The Different Types Of Attic Insulation?
When considering attic insulation, various options are available, each with its own features. Understanding these types can help you make the best choice for your home.
Cellulose vs. Fiberglass Insulation
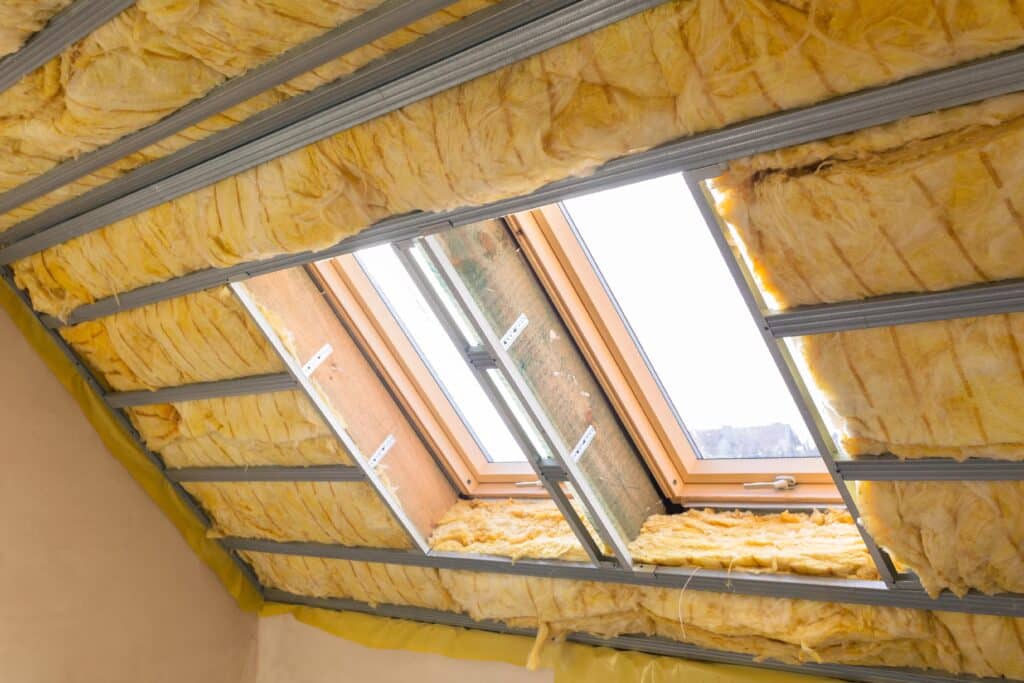
Cellulose insulation is made from recycled paper products and treated for fire resistance. It is often installed as blown-in insulation, filling all gaps in your attic. This type is eco-friendly and has a high R-value, usually around R-3.5 to R-3.7 per inch.
Fiberglass insulation, on the other hand, is available in batts and blown-in forms. It is made from fine glass fibers and is moisture-resistant. Fiberglass batts typically have an R-value of R-2.9 to R-3.7 per inch. While it can be cost-effective, improper installation can lead to air leaks.
Both types have their advantages depending on your insulation needs.
Understanding Blown-In Insulation
Blown-in insulation is commonly made from fiberglass or cellulose materials. It’s popular for adding insulation to hard-to-reach areas. The installation process involves using a special machine to blow loose particles into the attic space.
This method creates a seamless layer of insulation, which reduces heat loss. Blown-in insulation can easily adapt to any attic shape or size.
Vermiculite insulation is another type that falls under this category. While it is lightweight and fire-resistant, it may contain asbestos in older homes, which requires careful handling.
Comparing Batt Insulation And Spray Foam Insulation
Batt insulation comes in pre-cut panels, making it easy to install. You can find fiberglass batt insulation in most homes. It is ideal for standard stud sizes but needs proper sealing to prevent air leaks.
Spray foam insulation, like closed-cell or open-cell, offers superior air sealing. Closed-cell spray foam has a high R-value, around R-6.5 per inch. Open-cell spray foam has a lower R-value but is lighter and helps with soundproofing.
While batt insulation is typically cheaper, spray foam provides a better seal against air and moisture, making it highly effective.
Choosing the right type of insulation can lead to better energy efficiency and comfort in your home.
Common Mistakes To Avoid During Attic Insulation Removal
When removing attic insulation, it is essential to avoid common pitfalls. Each mistake can lead to health risks, increased costs, or improper removal. Paying attention to safety, pest issues, and regulations will help ensure a successful process.
Not Using Proper Safety Gear
Removing old blown insulation can expose you to harmful materials. Always wear a mask to protect your lungs from dust and fibers. Goggles will shield your eyes from any irritating particles.
Gloves are important, too; they protect your hands from sharp debris. If the insulation contains hazardous substances like asbestos, you may need specialized gear.
Ignoring these safety measures can lead to health problems later on. Ensure you prioritize safety to have a safe removal experience.
Overlooking Pest Infestations
While inspecting your attic, check for signs of pests like rats or other animals. Old insulation can be a nesting ground, and you should not ignore it. Look for droppings, shredded materials, or any damage to insulation.
If you spot pests, address the problem before starting insulation removal. You may need to contact a pest control professional.
Failing to handle infested areas can lead to health risks. Rats, in particular, can carry diseases that affect you and your family.
Ignoring Local Regulations For Insulation Disposal
Each area has specific rules regarding insulation disposal. Leaving old insulation improperly can result in fines. Research your local regulations to know how to dispose of insulation responsibly.
Some types may require special handling, particularly if they contain hazardous materials. If unsure, contact your local waste management office for guidance.
Not complying with these regulations can lead to costly penalties and environmental issues. Always follow the laws to ensure responsible disposal practices.
Frequently Asked Questions
What procedures are recommended for safe insulation removal?
To ensure safety, wear protective gear such as gloves, goggles, and a mask. Start by turning off the home’s power to avoid accidents. Remove insulation carefully to prevent dust and particles from spreading. If you suspect the presence of asbestos, it’s best to contact professionals.
How much can I expect to pay for professional attic insulation removal?
The cost of hiring experts for attic insulation removal usually ranges from $0.75 to $2.25 per square foot. This results in a total cost between $800 and $1,700 for a typical attic. Additional disposal fees might apply, depending on the volume and type of insulation.
Is it feasible and safe for homeowners to remove insulation without professional help?
Yes, homeowners can remove insulation themselves, but it involves risks. You need to follow safety guidelines closely. If the insulation contains hazardous materials like asbestos, hiring a professional is essential to avoid health risks.
What factors contribute to the overall cost of removing old insulation from a house?
Several factors affect insulation removal costs. These include the size of the attic, type of insulation being removed, and the method used for removal. Additional costs may arise if there’s a need for cleanup or disposal of hazardous materials.
Are there any health risks associated with DIY insulation removal?
Yes, there are health risks when removing insulation yourself. You might be exposed to harmful fibers or dust, especially with older insulation materials. Wearing proper protective equipment reduces these risks, but it’s still safer to hire professionals in some cases.
What equipment is needed for the effective removal of attic insulation?
Essential equipment for removing insulation includes gloves, a mask, goggles, and a utility knife for cutting. A vacuum with a HEPA filter can help capture airborne particles. Having a ladder and bags for disposal will also make the process smoother.