

Are you looking for a way to improve the ventilation and cooling efficiency of your home?
Installing an attic fan could be the solution you need. Attic fans are designed to remove hot air from your attic, which can help reduce the temperature in your home and lower your energy bills.
In this article, we’ll cover everything you need to know about its installation, from choosing the right fan to preparing the site and connecting the wiring. Additionally, we will discuss how to learn how to install the fan safely and effectively.
Quick Guide to Attic Fan Installation
The first step in installing an attic fan is to choose the right type of fan for your needs. There are several different types of fans available, including roof-mounted fans, gable-mounted fans, and whole-house fans. Passive attic fans are another option for those looking for low-energy solutions.
Each type of fan has its advantages and disadvantages, so it’s important to do your research and choose the one that’s best suited to your home, considering the optimal airflow for your space. Once you’ve chosen your fan, the next step is to prepare the site for installation, ensuring that the rafters and attic vents are properly configured. This involves cutting a hole in your roof or gable vent and installing the fan according to the manufacturer’s instructions.
The final step in attic fan installation is connecting the wiring. This can be a bit tricky, so it’s important to follow the instructions carefully and make sure everything is connected properly. If you’re not comfortable working with electricity, it’s a good idea to find a professional to do the job for you. With the right fan and proper installation, you can enjoy improved ventilation and lower utility bills in your home.
Understanding Attic Fans
An attic fan is a type of ventilation system that helps regulate the temperature and humidity levels in your attic space. This can help prevent damage to your roof and reduce your energy bills by preventing heat buildup in your home. In this section, we will discuss the different types of fans and the their benefits for ventilation.
Types of Attic Fans
There are several types of attic fans available, each with its own set of advantages and disadvantages. The most common types include gable-mounted fans, roof-mounted fans, and solar-powered fans. Passive attic fans are commonly used for their energy-efficient properties.
Gable-mounted fans are installed on the gable end of your attic and are designed to pull hot air out of your attic space. They are typically less expensive than other types of fans and are easy to install, which can help reduce attic fan installation costs. However, they may not be as effective at cooling as other types of fans.
Roof-mounted fans are installed on the roof of your home and are designed to pull hot air out of your attic space. They are typically more expensive than gable-mounted fans but are more effective at cooling. They may also be more difficult to install.
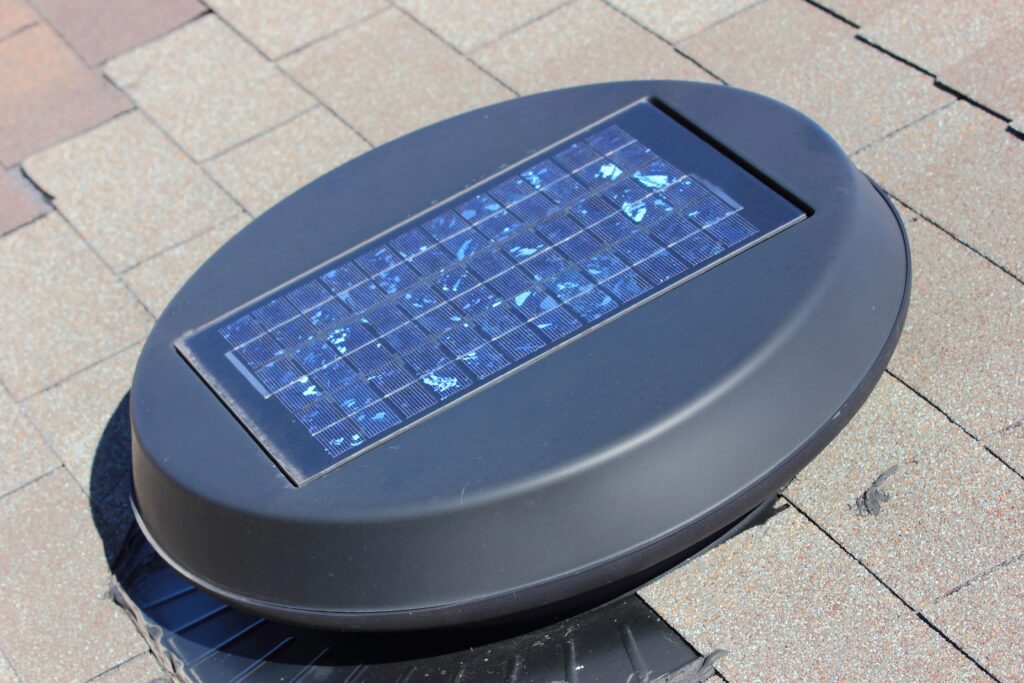
Solar-powered fans are a type of roof-mounted fan powered by solar energy. They are more expensive than other types of attic fans but are also more energy-efficient. Thanks to improved airflow and reduced reliance on air conditioning, they are a good option for those who want to reduce their energy bills and have a more environmentally friendly home.
Benefits of Attic Ventilation
Attic ventilation is an important part of maintaining a healthy and energy-efficient home. Proper ventilation can help reduce the risk of mold and mildew growth, prevent damage to your roof, and reduce your energy bills.
An attic fan can help improve your home’s ventilation by circulating the air. This can help prevent hot air from building up in your attic and reduce the strain on your air conditioning system. In addition, they can help prevent moisture buildup, which can lead to mold and mildew growth.
Overall, these fans can help improve the comfort and energy efficiency of your home. Whether you choose a gable-mounted fan, roof-mounted fan, or solar-powered fan, an attic fan can help keep your home cool and reduce your energy bills.
Pre-Installation Considerations
Before you start installing your attic fan, there are a few things you need to consider to ensure a successful project. In this section, we’ll cover the three main pre-installation considerations: assessing your attic space, choosing the right fan, and gathering the necessary tools and materials.
Assessing Attic Space
The first step in installing an attic fan is to assess your attic space. You’ll need to determine the square footage of your attic to ensure that you choose the right size fan.
You’ll also need to consider the location of your fan, particularly how it interacts with your attic vents. Attic fans are typically installed on the roof or gable-end wall of your attic. If you’re installing your fan on the roof, you’ll need to ensure that you have enough roof space to accommodate the fan and center the fan properly for optimal performance. If you’re installing your fan on the gable-end wall, you’ll need to ensure that you have enough wall space to accommodate the fan. It’s also important to have plenty of soffit or gable vents for the fan to draw air into the attic.
Roof-mounted fan:
- Make sure there’s enough space and that you center the fan for the best performance.
- Put it on the back of the roof, below the peak, but not so high that it’s visible from the front. Ideally, it should be in the center of the main attic space.
Gable-mounted fan:
- Ensure there’s enough space on the wall for the fan.
- Install it on the gable vent facing away from the wind that usually blows in your area.
Choosing the Right Fan
Once you’ve assessed your attic space, you’ll need to choose the right fan for your needs. Several factors to consider when choosing a fan include the type of fan you buy, the size of the fan, and the CFM rating of the fan.
When it comes to sizing your fan, you’ll need to ensure that you choose a fan that can move enough air to ventilate your attic properly, improving the overall airflow.
To choose the right fan, you have to do the following:
1. Figuring out the fan power (CFM):
- First, measure the square footage of your attic.
- Multiply that number by 0.7. This gives you the minimum amount of air (in cubic feet per minute, CFM) the fan should move.
Example: 1,000 sq. ft. attic x 0.7 = 700 CFM minimum fan rating
2. Adjusting for a hotter attic (optional):
- If your roof is steep or dark-colored, the attic will trap more heat. To account for this, increase the CFM you calculated in step 1:
- Steep roof: multiply CFM by 1.20 (add 20%)
- Dark roof: multiply CFM by 1.15 (add 15%)
3. Typical fan sizes and coverage:
- Most attic fans range from 800 to 1,600 CFM, with solar-powered attic fans on the higher end of the efficiency spectrum.
- A single fan can handle an attic up to around 2,200 square feet (depending on roof type).
4. Letting fresh air in:
- Check if you have enough vent space: divide the fan’s CFM rating by 300. This gives you the minimum square footage of intake vent space needed.
- Example: 700 CFM fan ÷ 300 = 2.33 sq. ft. of intake vent space needed
There you have it. Once you have your minimum CFM rating, you can choose your fan based on its CFM rating.
Another thing to note is whether you have enough vent space. Your attic fan needs fresh air to work properly. This comes in through vents called soffit vents (under the eaves) or gable vents. To find out if you have enough vent space, divide the fan’s CFM rating by 300. This gives you the minimum square footage of intake vent space needed.
Example: 700 CFM fan ÷ 300 = 2.33 sq. ft. of intake vent space needed
Tools and Materials
Before you begin your installation, you’ll need to gather the necessary tools and materials. Here’s a list of the tools and materials you’ll need:
- Attic fan
- Plywood
- Jigsaw
- Drill
- Screws
- Caulk
- Safety goggles
- Gloves
- Dust mask
Before you begin your installation, make sure that you have all of the necessary tools and materials. This will help ensure that your installation goes smoothly and that you don’t run into any unexpected issues.
By assessing your attic space, choosing the right fan, and gathering the necessary tools and materials, you’ll be well on your way to successfully installing your attic fan.
Installation Instructions & Process
When installing an attic fan, there are three main steps: mounting the fan, making electrical connections, and securing the fan in place. Follow the manufacturer’s instructions carefully to ensure a successful installation.
Mounting the Fan
Before you begin, use a tape measure to measure the distance between the fan’s mounting brackets. Cut a piece of plywood wide enough to span this distance and long enough to extend beyond the framing members on either side of the hole where you’ll install the fan. This will give you a sturdy surface to mount the fan.
Next, place the fan over the hole and slide it up into place. The flange should slip underneath the shingles you loosened earlier. Only the bottom two corners of the flange should be exposed. Follow the manufacturer’s instructions for securing the fan to your roof or gable, ensuring all components are attached to a nearby stud.
Electrical Connections & Wiring
Warning: Electrical work should only be performed by a qualified electrician if you are not comfortable doing so yourself. Improper electrical connections can lead to fires or serious injury.
Assuming you’re comfortable and have the necessary permits, here’s a breakdown of making safe electrical connections for your attic fan:
Gather Your Tools and Materials:
- Wire strippers: Used to carefully remove a small section of insulation from the end of electrical wires.
- Wire nuts: These small, insulated caps connect two or more wires together.
- Electrical tape: Provides additional insulation and protects the connection from loosening.
- Wiring diagram or instructions: This will come with your specific fan model and is crucial for following the manufacturer’s recommended wiring scheme.
Making the Connections:
- Turn off the power: Locate your breaker box and shut off the circuit that supplies power to the area where you’ll be installing the fan. Before proceeding, double-check that the power is off using a voltage tester.
- Locate the power source: You’ll typically connect the attic fan to a nearby junction box in the attic. This box will already have several existing wires.
- Identify the wires: Most houses in the US use a color-coded wiring system:
- Black wire: Hot wire (carries electricity)
- White wire: Neutral wire (completes the circuit)
- Bare copper or green wire: Ground wire (protects from electrical shock)
- Follow the wiring diagram: Refer to the specific instructions for your fan model. It will detail which wire from the fan connects to which wire in the junction box. In most cases, it will follow the standard color scheme:
- Black fan wire to black wire in the box
- White fan wire to white wire in the box
- Green or bare fan wire to the ground wire (usually bare copper or green) in the box
- Make secure connections:
- Use the wire strippers to carefully remove about ½ inch of insulation from the end of each wire (fan and junction box wires).
- Twist the exposed copper strands of each wire together (matching colors) using a wire nut. Tighten the wire nut securely with your fingers.
- You can optionally wrap the connection with a small amount of electrical tape for additional security.
- Double-check your work: Ensure all connections are secure and no bare wires are exposed. Refer back to the wiring diagram to confirm everything is correct.
- Turn power back on: Once you’ve finished making the connections and double-checked everything, restore power at the breaker box.
Remember: Safety first! If you’re unsure about any part of the electrical work, consult a qualified electrician.
Securing the Fan
Once you’ve mounted the fan and made the electrical connections, it’s time to secure it in place. Use the plywood you cut earlier to create a frame around the fan. Cut the plywood to fit around the fan, leaving a small gap between the fan and the plywood to allow for airflow.
Secure the plywood that’s wide enough to the framing members in your attic using screws or nails. Be sure to use enough screws or nails to hold the plywood securely in place. Once the plywood is secured, you can attach the fan to the plywood using the manufacturer’s recommended method.
With these steps, can install an attic fan and improve the ventilation in your attic.
Costs and Hiring a Pro to Install Attic Fan
When it comes to attic fan installation, there are two options: DIY or hiring a professional. While DIY installation may seem like a cost-effective solution, it’s important to consider the potential risks and complications that can arise during the installation process. Hiring an installer is generally recommended, as they have the necessary experience and expertise to ensure a safe and efficient installation.
DIY vs. Professional Installation
DIY installation of an attic fan may seem like a tempting option to save on costs, but it’s important to consider the potential risks and complications that come with it. It’s best to hire a professional if you’re unsure.
One of the biggest risks of DIY projects is the possibility of injury due to working at heights and electrical shock. Additionally, improper installation can lead to poor performance and inefficiency, which can end up costing you more in the long run.
A professional installer is the best way to ensure a safe and efficient installation. A local attic fan installer or licensed electrician can provide expert installation services, ensuring that your fan is installed correctly and according to local building codes.
Installation Cost Factors: Find Out How Much It Could Cost
The cost of attic fan installation can vary depending on a number of factors, including the type of fan, the size of your attic, and the complexity of the installation process.
Average cost ranges from $300 to $900. A new attic fan can cost anywhere from $90 to $850 for electric or solar models or $20 to $100 for roof turbines. Labor costs for installation can range from $100 to $500, depending on the complexity of the installation process.
When hiring a professional attic fan installer, it’s important to consider their experience and expertise, as well as their licensing and insurance. Hiring a licensed electrician is generally recommended for electrical work, as they have the necessary training and expertise to ensure a safe and efficient installation. Additionally, hiring a professional can help you avoid costly mistakes and ensure that your fan is installed correctly and according to local building codes.
While DIY installation may seem like a cost-effective solution, hiring a professional attic fan installer is generally recommended for a safe and efficient installation. When estimating installation costs, it’s important to consider the type of fan, the size of your attic, and the complexity of the installation process. Hiring a licensed electrician is generally recommended for electrical work, as they have the necessary expertise and training to ensure a safe and efficient installation.
Consider Installing a Solar Attic Fan
Solar powered attic fans are a compelling choice for homeowners looking for an eco-friendly and cost-effective way to cool their attic. These fans utilize solar power to remove hot air, promoting ventilation and reducing heat buildup. Here’s a breakdown of the key factors to consider:
Benefits:
- Cost-Effective: Solar fans eliminate the need for electrical wiring and ongoing electricity costs, making them a budget-friendly solution in the long run.
- Renewable Energy: They harness the power of the sun, reducing your reliance on traditional electricity and minimizing your environmental impact.
- Easy Installation (Generally): Solar attic fans are often simpler to install compared to powered fans. However, some models might require cutting into your roof or siding, so consult the manual carefully.
Considerations:
- Power: Solar attic fans are typically less powerful than electric fans. While effective for most climates, they might not be ideal for extremely hot areas or very large attics.
- Sunlight Dependence: For optimal performance, placement is crucial. Choose a location on your roof or exterior wall that receives ample sunlight throughout the day.
- Installation Location: The specific installation spot (roof or gable vent) will depend on the fan model and how it needs to vent your attic space. Some models might require cutting, so be sure to follow the manufacturer’s instructions.
Safety Tips:
- Always prioritize safety. Consult the manual thoroughly and wear proper safety gear when cutting into any building materials.
- If you’re unsure about any steps during installation, consider seeking help from a qualified roofer or contractor.
Maintenance and Troubleshooting
Regular Maintenance
Maintaining your fan is crucial to ensure it operates efficiently and effectively. Regular maintenance will also extend the life of your fan. Here are some maintenance tasks you should perform:
- Clean the fan blades and housing: Dust and debris can accumulate on the fan blades and housing, reducing the fan’s efficiency. Use a damp cloth to wipe the blades and clean the housing.
- Lubricate the motor: Lubricating the motor reduces friction, which can cause it to overheat and fail. Consult your fan’s manual for instructions on how to lubricate the motor.
- Check the fan’s wiring: Make sure the fan’s fan’s wiring is in good condition and properly connected. Loose or damaged wiring can cause the fan to malfunction or fail.
Performing these tasks annually or bi-annually will help ensure your attic fan operates at peak performance.
Common Issues and Solutions
Despite regular maintenance, your attic fan may experience issues from time to time. Here are some common issues and solutions:
Despite regular maintenance, your attic fan may experience issues from time to time. Here are some common issues and solutions:
| Issue | Solution |
| Fan not turning on | Check the fan’s thermostat setting. If the temperature setting is too high, the fan will not turn on. Lower the temperature setting and see if the fan turns on. If not, check the fan’s wiring and motor. |
| Fan making unusual noises | Check the fan blades for damage or debris. Clean the blades and housing. If the noise persists, the fan’s motor may be failing and should be replaced. |
| Mold growth in attic | Excessive moisture in your attic can cause mold growth. Make sure it’s properly ventilated and consider installing a dehumidifier. |
| Fan not cooling your home | If your fan is not cooling your home, it may be undersized. Consult a professional to determine the appropriate size fan for your attic. |
| Fan not cooling entire home | If your fan is not cooling your entire home, consider installing additional fans or using a whole-house fan. |
Downloadable version here: Green Attics Media Attachments.png
Conclusion
Installing an attic fan can greatly improve your home’s ventilation and energy efficiency. With the right type of fan and proper installation, you can create a cooler, healthier living environment while reducing your bills. Attic ventilation is crucial for maintaining a comfortable home and preventing potential issues such as mold and mildew growth. Therefore, careful consideration of the type of fan and the installation process can make a significant difference in your home’s overall comfort and energy efficiency.
Frequently Asked Questions
How much does it cost to have an attic fan installed?
The cost of installing an attic fan can vary depending on the size and type of fan and the complexity of the installation. On average, the cost can range from $200 to $600, not including any additional electrical work that may be needed.
Do I need an electrician to install an attic fan?
It is recommended to hire a licensed electrician to install an attic fan. Working with electrical systems can be dangerous, so it’s best to have a professional handle the installation to ensure it is done safely and up to code.
Are attic fans worth installing?
Attic fans can be worth installing, especially in areas with hot climates. They can help reduce the temperature in the attic, which can lower cooling costs and extend the life of the roof by reducing heat buildup.
Why are attic fans not used anymore?
Attic fans are still used and can be beneficial in certain situations. However, some experts argue that in well-sealed and insulated homes, the need for these fans may be reduced. Additionally, newer ventilation strategies and technologies have become more popular, leading to less reliance on traditional attic fans.